A guitar, an iconic instrument loved by many music enthusiasts, comprises several parts including the strings, headstock, fretboard, and body. Each component contributes to the overall sound production and aesthetics of the guitar. To maintain optimal performance and prolong the instrument’s lifespan, regular cleaning is crucial. One often overlooked area in guitar maintenance is the fretboard. Beginners, and even seasoned guitarists, tend to focus on cleaning the strings, neglecting the equally important fretboard.
Importance of a Clean Fretboard
The fretboard, also known as the fingerboard, is where a musician’s fingers strike the strings to produce sound. It endures constant contact and friction, accumulating dirt and oils over time. This grime can hamper the playing experience and possibly affect the guitar’s sound quality. Therefore, every guitar player, regardless of skill level, should learn how to clean the fretboard effectively.
Essential Household Items for Fretboard Cleaning
Cleaning a guitar fretboard doesn’t necessarily require specialized tools or expensive cleaning solutions. In fact, a variety of common household items can effectively clean and preserve the fretboard:
- Lemons – The acidity of lemons can help break down stubborn grime;
- Oil – Natural oils such as lemon oil or linseed oil can condition the fretboard, preventing it from drying out;
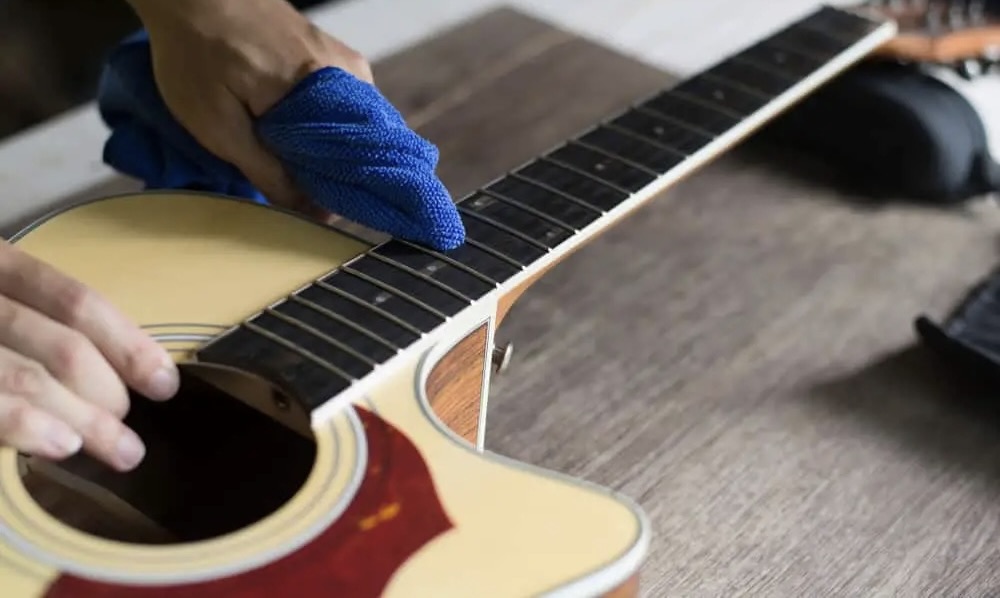
- Cloth – A soft, lint-free cloth can safely remove dirt without scratching the fretboard’s surface;
- Dishwashing Liquid – A mild dish soap can be used to treat heavy dirt accumulation, but use sparingly to avoid damaging the wood.
To start cleaning, apply a small amount of lemon juice or mild dish soap to the cloth and gently rub the fretboard, paying special attention to the area around the frets where dirt tends to accumulate. After cleaning, it’s a good idea to condition the fretboard with a suitable oil to keep it from drying out.
Six Essential Steps for Cleaning Your Guitar Fretboard
1. Set Up an Effective Workspace
Before you start cleaning your guitar, it’s important to prepare a clean and organized space to work in. By doing so, you can prevent accidental drops, slips or collisions with other objects that could potentially damage your guitar.
Establish a neat and clean area where you can apply the cleaning process without interruption. Lay out your cleaning materials and tools neatly to prevent confusion and improve efficiency.
Tips for an Effective Workspace:
- Clean the Area: Clean the space where you’ll be cleaning the guitar. Even small amounts of dust or grime can get onto the guitar, so make sure the area is spotless;
- Prevent Accidents: Protect the guitar by working on a non-slip, soft surface to prevent it from sliding, and keep it away from edges where it could potentially fall;
- Keep Tools Handy: Assemble all the tools and materials you’ll need before starting. This not only saves time but also allows you to stay focused on the task at hand.
2. Safely Remove the Strings
Once you have your tools and materials organized, the next step is to carefully remove all the strings from your guitar. Doing so provides unrestricted access to the fretboard, allowing you to clean it more thoroughly.
Remember, you don’t need to fully tighten the strings to remove them; just loosen them enough to pull them free safely. If your guitar has a floating tremolo system, make sure to block it to prevent it from sinking into the cavity once the strings are removed.
Tips for Safe String Removal:
- Gradual Release: Gradually loosen all the strings before removing them to prevent them from snapping back and causing injury or damage;
- Floating Tremolo Management: If you have a floating tremolo, you can block it with a suitable object to prevent it from retreating into the guitar’s body once the strings are removed;
- String Removal: Once all the strings are sufficiently slack, you can then remove them. If necessary, consider using a string winder tool to make the removal process easier.
3. Gently Scrub with a Plastic Scrapper
With the strings removed, you now have unrestricted access to the fretboard. The next step is to cautiously scrub between the frets using a suitable, non-abrasive plastic tool. An old, no-longer-needed plastic gift card often makes for an excellent tool for this job. Take care to scrub along the grain of the wood, not across it. This is a delicate procedure, and it’s essential to avoid applying excessive pressure. Over-zealous scrubbing can lead to unnecessary scratches and damage to the guitar’s body.
If your chosen tool has sharper edges, such as a guitar pick or a credit card, be sure to apply even less pressure to avoid denting the wood of the fretboard. As with any cleaning task, it’s always a wise idea to take personal safety precautions. In this case, consider wearing a face mask to protect yourself from any dust that could potentially irritate your respiratory system.
Tips for Effective and Safe Scrubbing:
- Use the Right Tool: The best tool for this task is something made of plastic, non-abrasive, and with a thin edge, such as an old gift card;
- Scrub Along the Grain: Always scrape along the wood grain, not across it. Doing so will minimize the chance of causing any damage to the fretboard;
- Apply Gentle Pressure: Depending on the tool you’re using, it’s crucial to apply the correct amount of pressure when scrubbing to avoid causing dents in the wood;
- Take Safety Precautions: Cleaning can often lead to dust particles being in the air. Protect yourself by wearing a safety mask, especially if you are prone to dust allergies or respiratory issues.
4. Carefully Remove All Tape
The next step in your guitar cleaning endeavor is to cautiously and slowly remove all the tape from the guitar’s body. It’s worth noting that using regular masking tape is not recommended due to its high adhesive strength. Modern guitars typically have hard and sturdy finishes which lead some people to believe that the finish can withstand aggressive tape removal, but this is not the case; improper tape removal can damage your guitar unnecessarily.
As you carefully remove the tape, check for any residual adhesive or debris left behind, especially any metallic fragments that may have been used during the cleaning process. If you find any, you can gently remove them with a lint-free cloth or use a vacuum cleaner with a delicate, soft brush attachment to pick up the dust and minute particles without damaging the guitar’s surface. Remember to adjust the vacuum’s power and keep the nozzle at a safe distance from the guitar to avoid any potential damage.
Tips for Safe Tape Removal:
- Use Low-Adhesive Tape: To avoid damaging your guitar’s finish, always pick a low-adhesive tape such as painter’s tape;
- Check for Residue: Once the tape is removed, examine the guitar for any leftover adhesive or debris;
- Use Vacuum for Cleaning: A vacuum with a soft brush attachment can help lift any remaining dust or particles from your guitar, just be mindful of the pressure and distance.
5. Apply Oil to the Fretboard
Among the crucial steps in the process of cleaning your guitar fretboard is oiling. Not only does it clean the instrument thoroughly, but it also conditions the wood, helping maintain its quality and ensuring smooth playability. While some might argue that there is little difference in cleaning with oil or without, it’s important to consider that oiling can work wonders in revealing the natural beauty of the wood and removing embedded dirt.
After you’ve diligently removed the grime and dust from the fretboard, the next step is to apply a guitar-friendly oil. Opt for a soft cloth and dab some oil onto it. Carefully apply the oil along the fretboard, using circular motions to ensure it penetrates into the wood, reaching the hidden dirt.
Once you’ve applied the oil, use another clean, dry cloth or tissue to wipe off the excess oil. It’s crucial to avoid leaving your fretboard soaked with oil. A lightly oiled fretboard is the goal here.
Tips for Proper Oiling:
- Choose the Right Oil: Opt for oils specifically designed for guitar maintenance. If you can’t find any, mineral oil or lemon oil can be acceptable alternatives;
- Apply Moderately: You don’t need to drench the fretboard in oil. A little goes a long way;
- Wipe Off Excess Oil: Use a dry, lint-free cloth to wipe off any excess oil. The fretboard should look shiny but not wet.
6. Let your Fretboard Breathe: Wipe Off Excess Oil
After the oiling process, it’s vital to make sure that no excess oil is left behind on your guitar fretboard. Excessive oil might attract dust and grime, gradually leading to build-up that damages the fretboard’s appearance and functionality. Moreover, oil residue can also end up seeping into other guitar parts, compromising overall performance.
It’s recommended to do a thorough clean-up post oiling. It will not only enhance the fretboard’s look and feel but also contribute to the better longevity of your acoustic companion. Here’s how you should go about it:
Steps to Remove Surplus Oil:
- Prepare Your Tools: Use a lint-free cloth or tissue paper. Make sure it’s clean and soft to prevent scratching or damaging the fretboard;
- Wipe it Down: Gently press the cloth against each fret to lift off the surplus oil. The trick is to follow the direction of the wood grain when wiping. This protects the wood and helps maintain its natural beauty;
- Use a Light Touch: Be very gentle when wiping. The fretboard, especially if it’s made of softer woods like rosewood, is quite delicate. So, a light touch is all you need to get rid of the excess oil;
- Make a Thorough Inspection: After wiping, check the fretboard meticulously. If there’s any sheen or glossy areas, it might be due to leftover oil. Go over these spots again with the cloth until the entire fretboard has an even, matte finish.
Exploring the Best Concert Ukulele
While the guitar reigns supreme, the ukulele carves out its niche with a charm that’s uniquely its own. Among its various forms, the concert ukulele occupies a special place. This intermediate-sized uke combines portability with rich, mellower tones, making it an excellent choice for both beginners and experienced players.
When it comes to cleaning and maintaining a ukulele, the principles largely parallel those of the guitar. Just as the fretboard is pivotal to the guitar’s performance, so too is it crucial for the ukulele. A clean fretboard on a concert ukulele ensures that the distinctive tones it produces remain crystal clear and melodious.
Conclusion
Taking proactive steps to maintain the condition of your guitar is a testament to the dedication of a musician. Cleaning the fretboard with household items is not just cost-effective, but it also guarantees the longevity and quality of your instrument’s performance. So whether you’re a beginner or a seasoned guitarist, this guide offers a comprehensive and easy-to-follow method to keep your guitar sounding its best. Embrace the routine, and let your music shine through a well-cared-for instrument.